Building a Stripe Webhook Server in Typescript with AWS CDK - Part 1
Describing a CDK stack
In this series of posts I am going to walk you through the steps I took to create a Stripe webhook endpoint in AWS.
We are going to use API Gateway as a proxy to a Lambda function and use the AWS CDK as our provisioning tool.
The CDK makes the creation of our AWS resources very straightforward and we can code the whole process (including our Lambda function code) in Typescript. Thanks to the dedicated NodeJS Lambda construct provided by the CDK library we can do this without having to worry about setting up any transpilation or having to do anything funky to package our Lambdas.
If you need to understand a bit more about Stripe webhooks, and why you might need to integrate with them, then check out this page from the Stripe docs.
Setting Up
You will need to have installed the following tools:
You will also need to configure a default AWS profile following these instructions.
And, finally, set yourself up a Stripe account to get hold of secret keys and a webhook secret from developers section.
Initialising our CDK project
A simple first step using the CDK CLI. Create a project directory and run the following command inside:
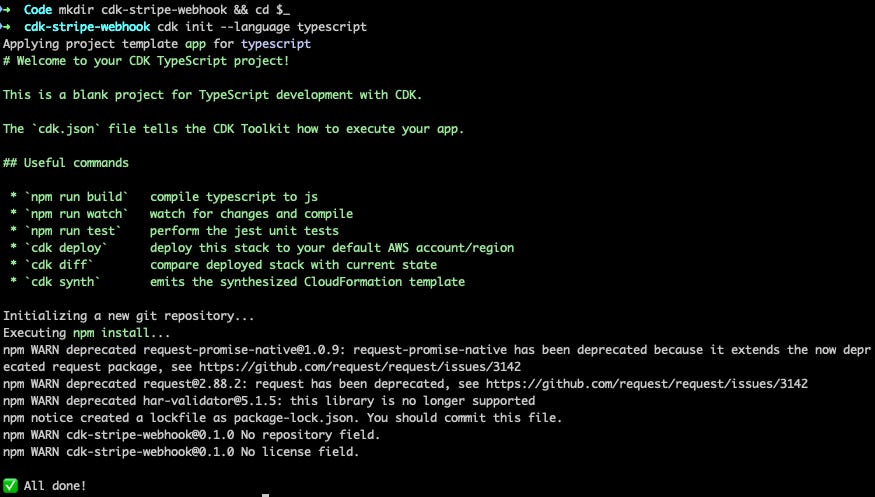
cdk init --language typescript You should get some output like this if everything is successful.
Oopen your project in your favourite IDE you will see a set of skeleton files included in the `lib`, `bin` and `test` directories.
Run `yarn test` for fun and check the unit tests pass.
Of course they do - we haven't had a chance to break anything yet.
Install Dependencies
We will require a couple of CDK constructs to build our webhook; `aws-apigateway` and `aws-lambda-nodejs`.
The NodeJS Lambda construct is a higher level abstraction built on the `aws-lambda` construct and saves us writing boilerplate common to all NodeJS Lambda functions and more importantly it also embeds Parcel which detects when we are using typescript and automatically transpiles and bundles into a single common JS file for deployment. This means we can write a tidy, unconstrained Typescript application and have it transformed and optimised for deployment with zero extra setup work.
Finally we need a way to manage the Stripe configuration. For this we will use the ubiquitous `dotenv`.
yarn add @aws-cdk/aws-apigateway @aws-cdk/aws-lambda-nodejs dotenv
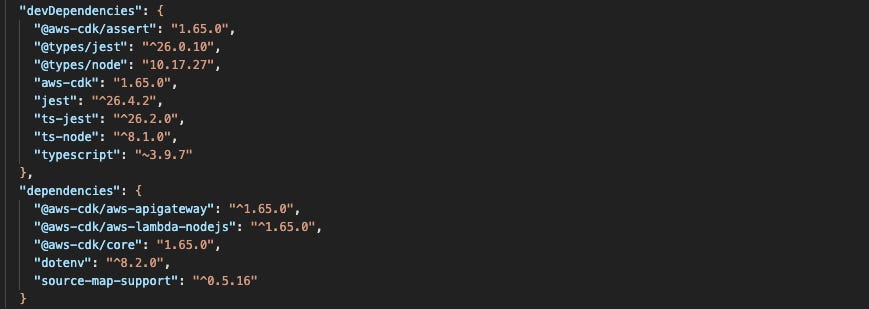
IMPORTANT —> Review your `package.json` and make sure that all `@aws-cdk` packages are using the same version or you will get errors later on.
Describing our Stack
With dependencies all installed we can get on with writing a CDK stack to provision the cloud resources we need.
Open up `lib/{your-dir}-stack.ts` in your editor and add your import statements.
import * as apigateway from "@aws-cdk/aws-apigateway";
import * as lambda from "@aws-cdk/aws-lambda-nodejs";
import * as cdk from"@aws-cdk/core";
Then declare an interface for a custom props object. We will use this to pass configuration values into our stack so we can name our API Gateway stage and configure the Stripe SDK inside our Lambda at runtime.
export interface StripeWebhookProps {
 stage: string;
 secret_key: string;
 webhook_secret: string;
}
Next we need to edit the signature of our stacks constructor to accept our custom props object (which implements our new interface) as the last argument.
export class StripeWebhookStack extends cdk.Stack {
  constructor(
   scope: cdk.Construct,
   id: string,
   props: StripeWebhookProps //<-- Add type to this argument
){
  //...other stuff
 }
Now that we have our stack signature setup we can start implementing the body of the constructor.
Go ahead and drop the following code blocks into the constructor after the call to `super`.
   const handler = new lambda.NodejsFunction(
     this,
     `StripeWebhookHandlerLambda-${props.stage}`,
     {
       handler: "handler",
       entry: __dirname + "/../handler/index.ts",
       environment: {
         SECRET_KEY: props.secret_key,
         WEBHOOK_SECRET: props.webhook_secret,
       },
     }
   );
This describes a Lambda function with NodeJS runtime and passes in our configuration as environment variables so they are available to the Lambda at runtime. All we have to do to transpile, bundle and prepare our asset for our Lambda is point the `entry` attribute at the path of the entry file for a typescript application.
In my example I have used a directory at the project root called `handler`. Create this directory and add the file `index.ts`.
Next step is to describe our API Gateway resource and pass the Lambda function in as the default handler. Add the following code:
new apigateway.LambdaRestApi(
     this,
     `StripeWebhookHandlerApi-${props.stage}`,
     {
       handler,
       deployOptions:{
         stageName:props.stage
       }
     }
   );
Your finished stack definition should look like this:
import * as apigateway from "@aws-cdk/aws-apigateway";
import * as lambda from "@aws-cdk/aws-lambda-nodejs";
import * as cdk from "@aws-cdk/core";


export interface StripeWebhookProps {
 stage: string;
 secret_key: string;
 webhook_secret: string;
}

export class StripeWebhookStack extends cdk.Stack {
 constructor(
   scope: cdk.Construct,
   id: string,
   props: StripeWebhookProps
 ) {
   super(scope, id);
   //Create handler Lambda function
   const handler = new lambda.NodejsFunction(
     this,
     `StripeWebhookHandlerLambda-${props.stage}`,
     {
       handler: "handler",
       entry: __dirname + "/handler/index.ts",
       environment: {
         SECRET_KEY: props.secret_key,
         WEBHOOK_SECRET: props.webhook_secret,
       },
     }
   );
   //Create Rest API with default handler
   new apigateway.LambdaRestApi(
     this,
     `StripeWebhookHandlerApi-${props.stage}`,
     {
       handler,
       deployOptions:{
         stageName:props.stage
       }
     }
   );
 }
}
This terse ~40 lines of code is all you need to produce all the Cloudformation required to deploy a working webhook.
Finally we need to update our CDK application entry point which is the file under `bin/{your-project}.ts` (this is configured in `cdk.json` if you have any reason to move it around).
This is where we will integrate dotenv to read our configuration file and pass into our stack as our custom props object. First off add the following lines under your import statements:
import * as dotenv from "dotenv";

dotenv.config();
const {
 STAGE: stage,
 WEBHOOK_SECRET: webhook_secret,
 SECRET_KEY: secret_key,
} = process.env;

if (!stage || !webhook_secret || !secret_key)
 throw new Error("Missing env config");
This block simply reads a local .env file containing our configuration values and assigns them to their corresponding variables. To stop typescript complaining we must check that the variables have values and error out if not.
Next step is to correct the stack constructor to accept the configuration as the custom props object.
new CdkStripeWebhookStack(app, "CdkStripeWebhookStack", {
 stage,
 webhook_secret,
 secret_key,
});
OK! Lets run our tests again and see how broken they are...
Very broken! We need to add a fake props object to the stack constructor. Update your unit test with the following and run your tests again.
const stack = new CdkStripeWebhook.CdkStripeWebhookStack(app, 'MyTestStack',{
     stage:"fake",
     webhook_secret:"fake_webhook_secret",
     secret_key:"fake_secret_key"
   });
Run your tests again and you should see a log of your Lambda bundling followed by a failed assertion error. This is expected as the default test created by `cdk init` is asserting an empty stack. As we have added resources this assertion is failing. Lets correct that.
Update your THEN assertions:
// THEN
   expectCDK(stack).to(haveResource("AWS::IAM::Role"));
   expectCDK(stack).to(haveResource("AWS::Lambda::Function"));
   expectCDK(stack).to(haveResource("AWS::ApiGateway::RestApi"));
Add the `haveResource` helper to your imports from the CDK Assert library. I am checking just for the obvious, however there are some more resources created in the Cloudformation template that you might also want to check for. The above should be enough to check that our code compiles and is creating what we originally intended.
Let’s run this again and finally see some green.
Boom!
Your final test file should look like this…
import { expect as expectCDK, haveResource } from "@aws-cdk/assert";
import * as cdk from "@aws-cdk/core";
import * as CdkStripeWebhook from "../lib/cdk-stripe-webhook-stack";

test("Expected resources are present", () => {
 const app = new cdk.App({ outdir: "./cdk.out" });
 // WHEN
 const stack = new CdkStripeWebhook.CdkStripeWebhookStack(app, "MyTestStack", {
   stage: "fake",
   webhook_secret: "fake_webhook_secret",
   secret_key: "fake_secret_key",
 });
 // THEN
 expectCDK(stack).to(haveResource("AWS::IAM::Role"));
 expectCDK(stack).to(haveResource("AWS::Lambda::Function"));
 expectCDK(stack).to(haveResource("AWS::ApiGateway::RestApi"));
});
In part 2 I will look at configuring the stack for deployment and implementing the Lambda in Typescript.


